
Always wondered how AI image generator apps work under the hood? Let’s dive into this topic. Since I made one myself, I’ll walk you through the main challenges and steps in this tutorial. We’ll set up two main parts:
- A simple but effective backend using Anvil and Python. This will take requests (with the prompts) from the iOS app and send them to replicate.com.
- Then, we’ll get to the fun part: learning how to use Swift to connect with our new backend and get the image we’re after.”
Glossary:
First, let’s clarify a couple of terms:
- Anvil: An online platform designed for building and deploying full-stack web apps with Python.
- Replicate.com: A service that offers Stable Diffusion (and many more) AI models. These models convert textual prompts into images.
Prerequisites:
- A free account on Anvil with the ‘replicate’ package installed.
- A ‘pay as you go’ plan on replicate.com. They offer very reasonable rates, but it’s wise to monitor your usage as always.
Let’s start!

1. Backend Setup with Anvil:
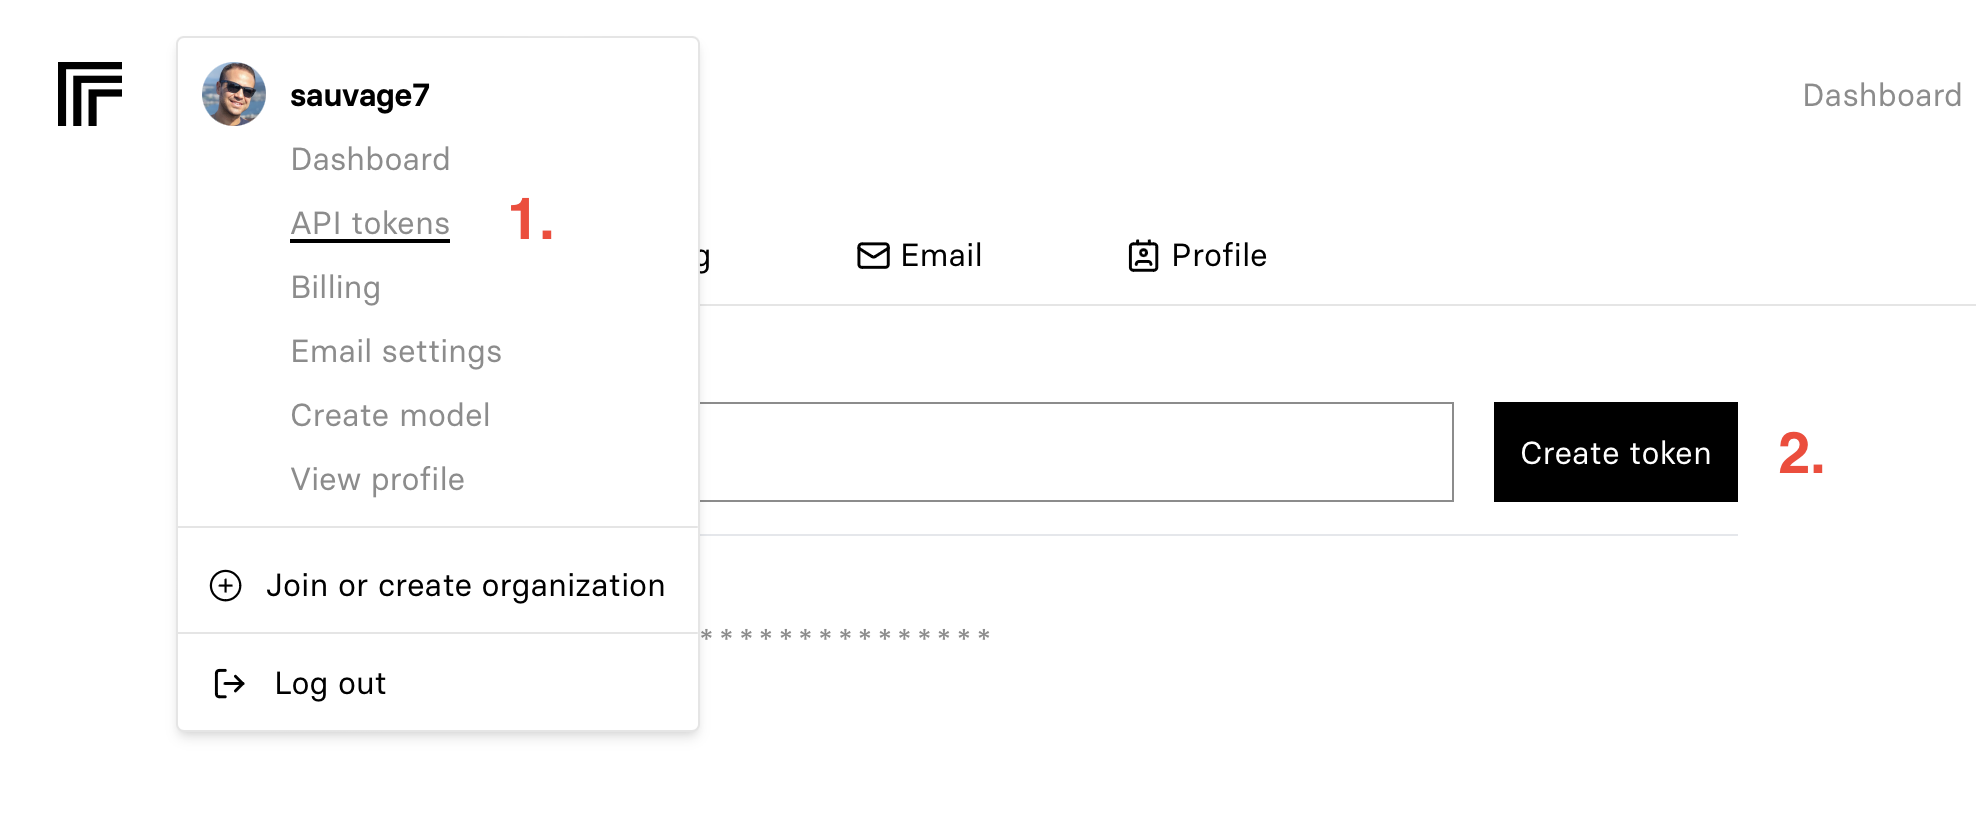
Retrieving API Keys from Replicate.com: Head to replicate.com, sign in, go to Profile > API tokens, choose a name for your key, create and note down your token for later.
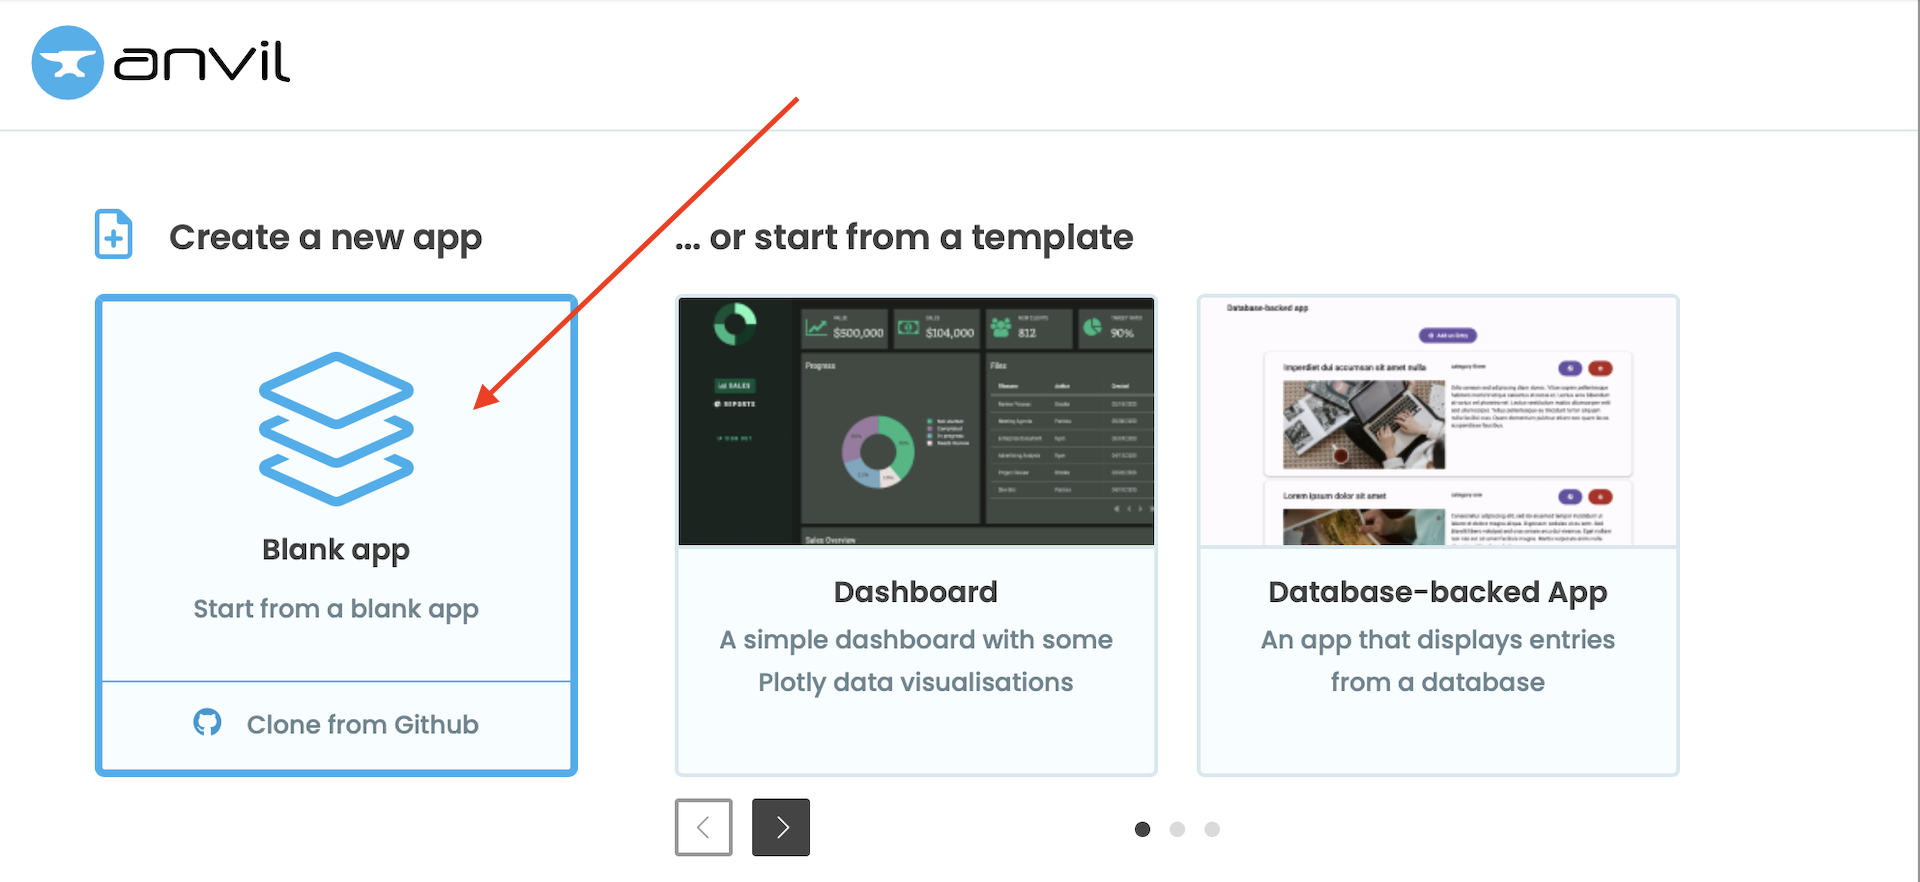
Initiating on Anvil: Navigate to Anvil, log in or sign up, and opt for a new blank app.
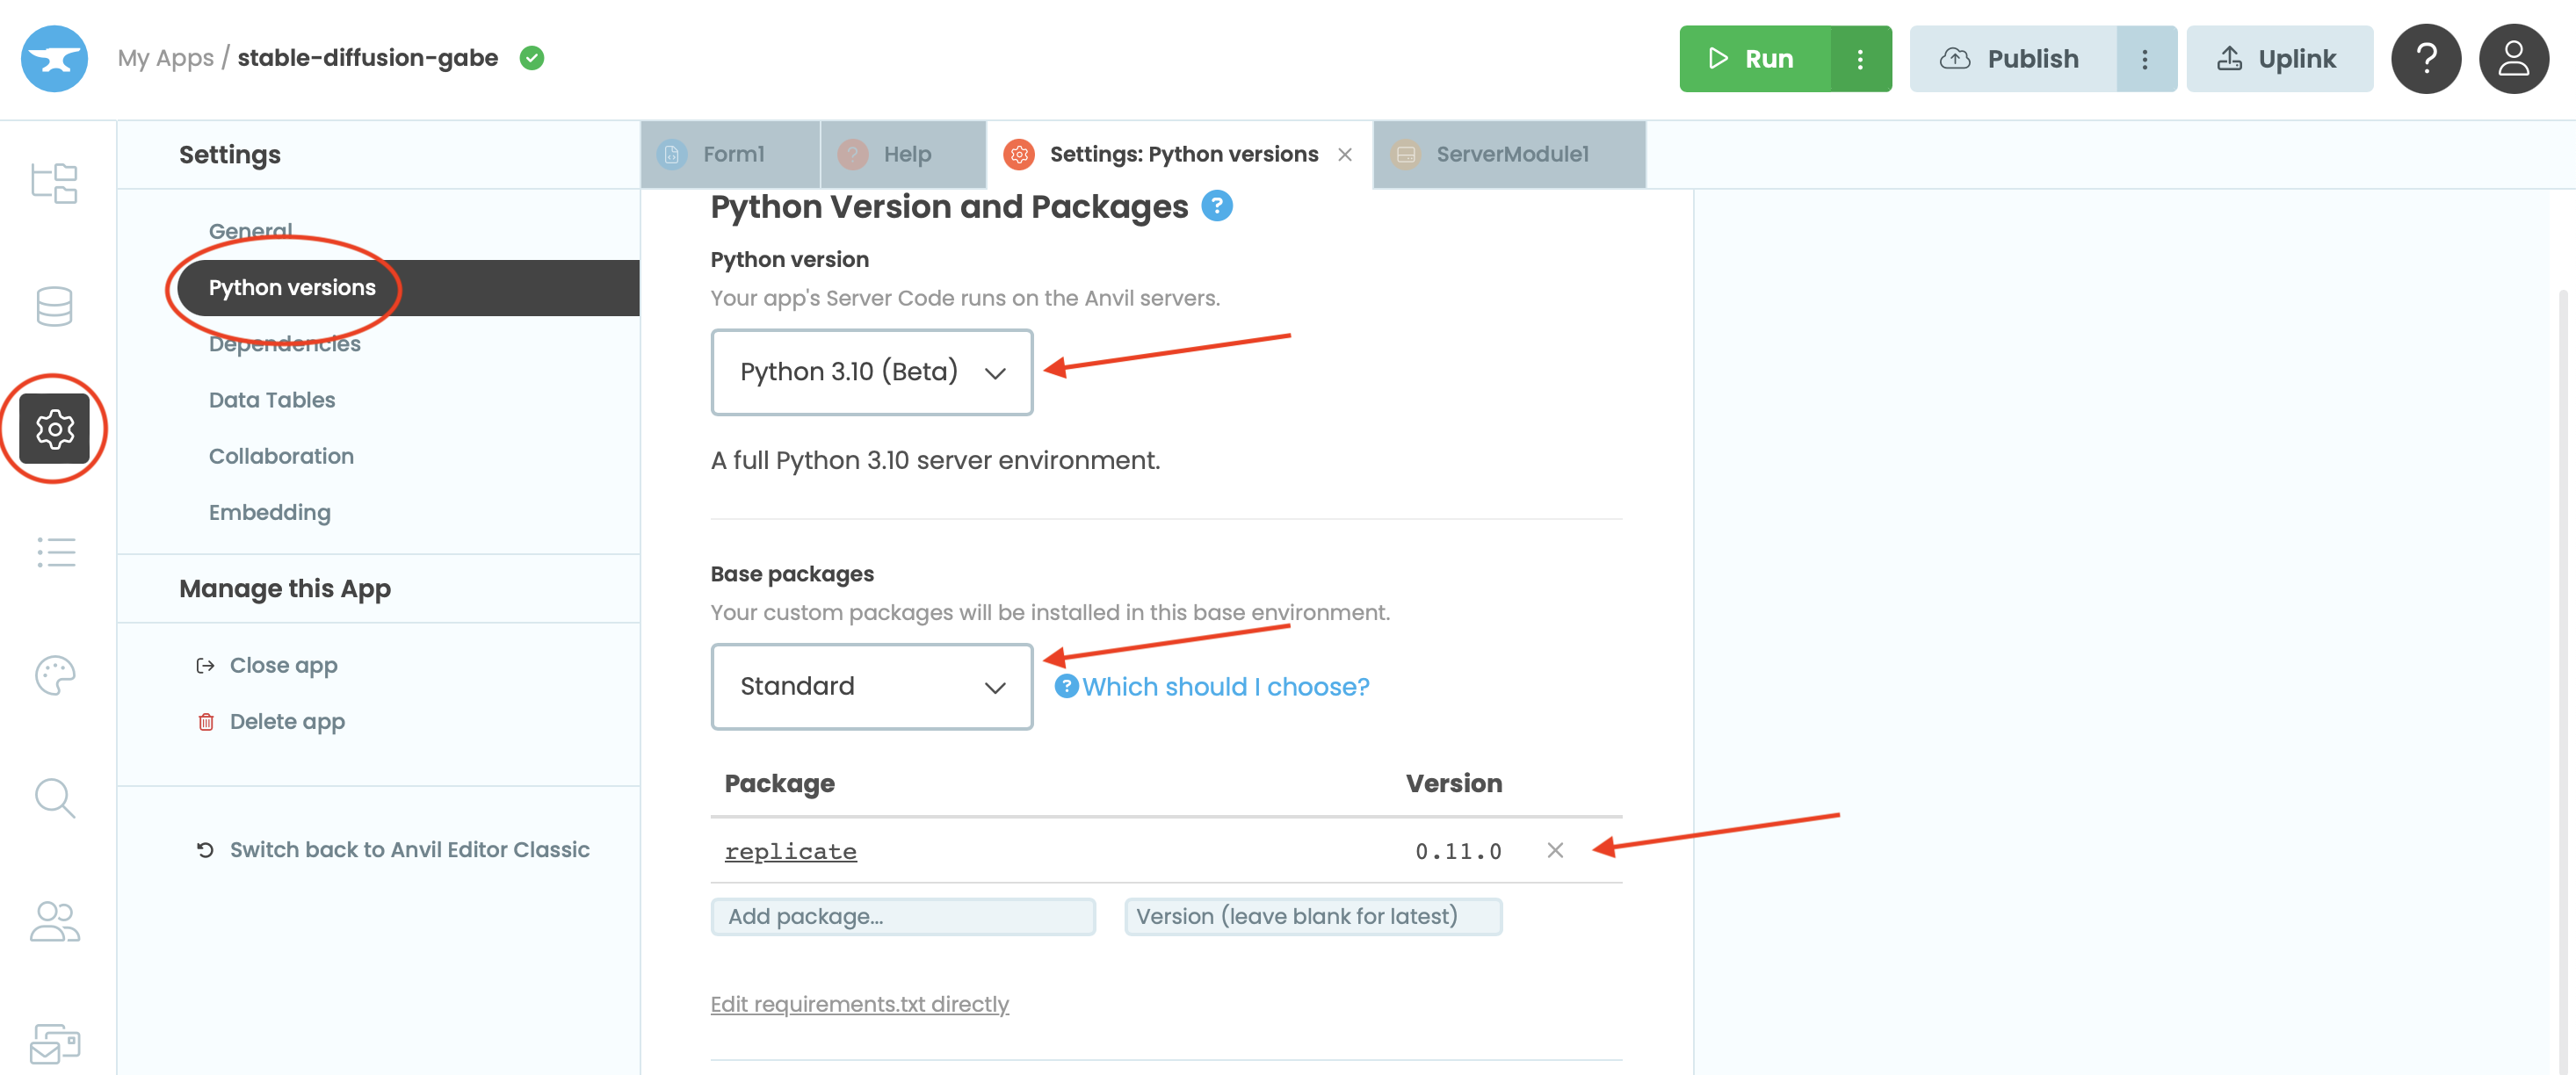
On Anvil, set Python 3.10 (Beta) under Settings > Python versions. In the packages section, ensure you’ve added the ‘replicate’ package, preferably version 0.11.0.
Now, onto the code. In the ServerModule section, use:
import anvil.users
import anvil.secrets
import anvil.server
import replicate

# Fetch the API token for replicate.com from Anvil's secrets storage
replicate_api_token = anvil.secrets.get_secret('REPLICATE_API_TOKEN')

# Define the API endpoint to connect with replicate.com
@anvil.server.http_endpoint('/predict_image_sd_xl_1_0', methods=["POST", "GET"], authenticate_users=False)
def predict_image_sd_xl_1_0(**q):
  userprompt = anvil.server.request.headers["prompt"]
  userpromptnegative = anvil.server.request.headers["negative_prompt"]
  userseed = anvil.server.request.headers.get("seed")
  usersteps = anvil.server.request.headers.get("steps")
  userscale = anvil.server.request.headers.get("scale")

  if not usersteps:
    usersteps = "30"

  if int(usersteps) > 50:
    usersteps = "50"

  if not userscale:
    userscale = "7.0"

  downloadURL = replicate.run(
    "stability-ai/sdxl:da77bc59ee60423279fd632efb4795ab731d9e3ca9705ef3341091fb989b7eaf",
    input={
      "prompt": userprompt,
      "negative_prompt": userpromptnegative,
      "seed": int(userseed),
      "plms": True,
      "height": 1024,
      "width": 1024,
      "num_outputs": 1,
      "guidance_scale": float(userscale.replace(',','.')),
      "scheduler": "K_EULER",
      "num_inference_steps": int(usersteps),
      "refine": "expert_ensemble_refiner",
      "apply_watermark": False
    }
  )

  return downloadURL[0]
Deciphering the Code:
- Import Statements:
anvil.users&anvil.secrets: Essential for user and secrets management in Anvil.anvil.server: Enables backend functionality and HTTP endpoint definitions in Anvil.replicate: Connects us to Replicate.com.- API tokens: Always use a secure way to handle API tokens. In this case, we’ve stored it in Anvil’s secure storage.
- API Endpoint: The connector between our backend and the iOS app. It collects the text prompts and other parameters, sends them to Replicate.com, gets an image URL in return, and passes it back to the iOS app.
What’s happening in the code you’ve just looked at? First, we’re importing all the necessary packages to make the code function. This includes the default packages from Anvil, like anvil.secrets, which makes secrets management straightforward.
You might have noticed that we defined the replicate_api_token parameter. This is stored as a secret key within Anvil’s environment. It’s safer to keep secrets and credentials in general out of the code base. Here’s how you can achieve it in Anvil:
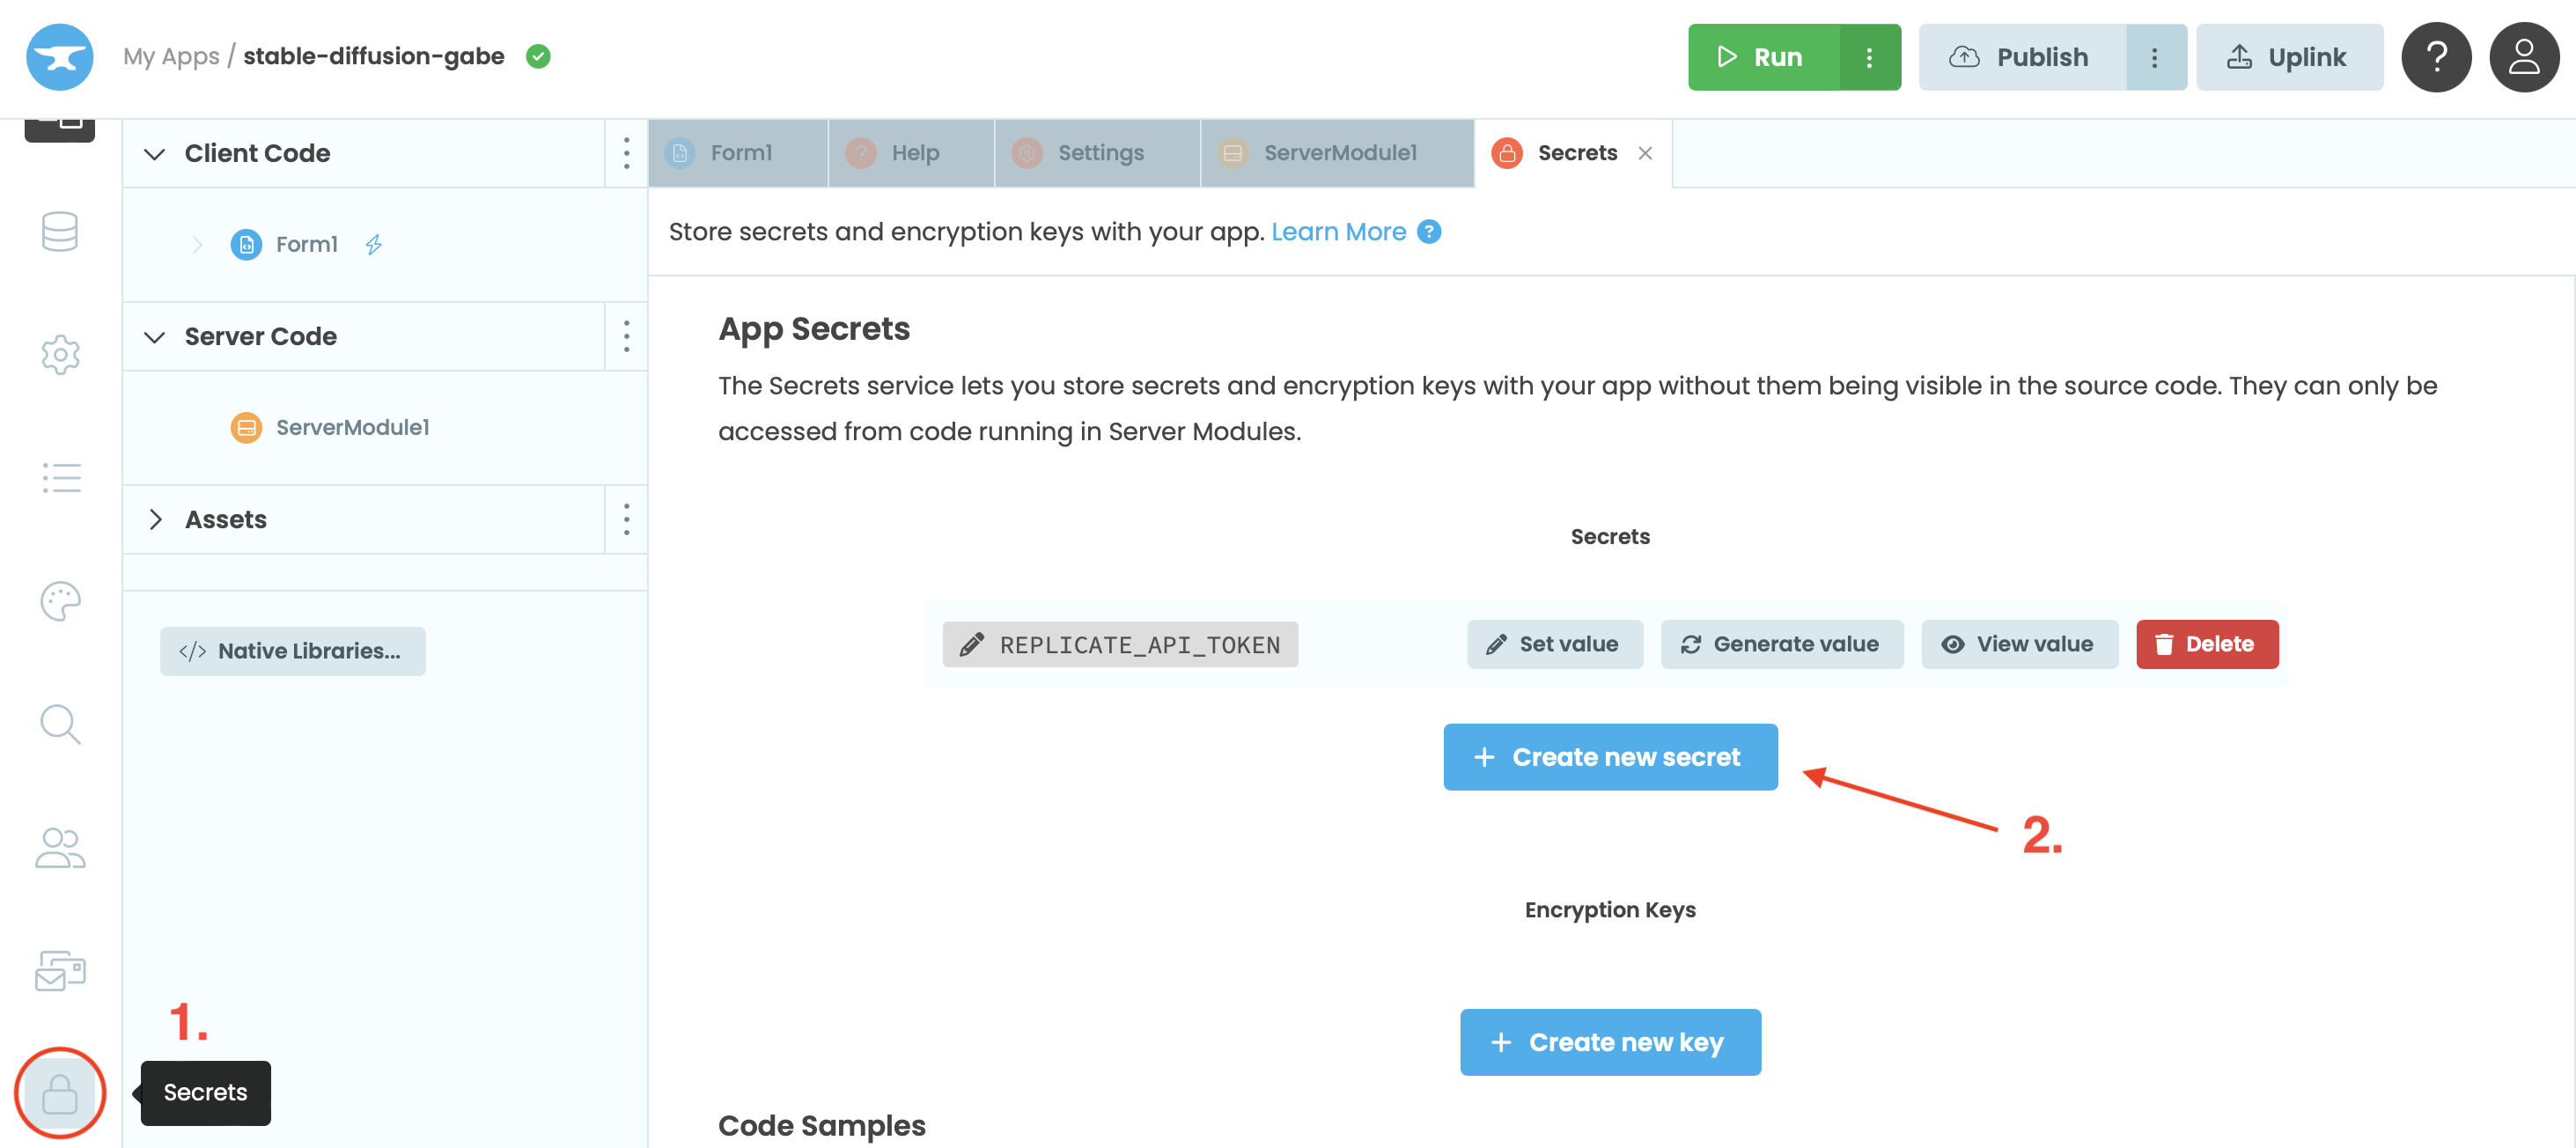
Keeping API keys or other credentials out of your main code is crucial. It’s a best practice because if your app’s code is reverse-engineered or accessed by malicious entities, they could misuse these keys, potentially racking up large bills on services like replicate.com. To protect against this, it’s advisable to set up your own backend infrastructure (and keep API keys and credentials out of your frontend code), deploy it securely, and ensure you’re not revealing any sensitive data. With Anvil, you can tuck away your API key(s) in the “Secrets” section. Here, you assign a global name to your API key, allowing you to reference it in your code without directly displaying the key itself.
Next, we establish our first API endpoint, which the iOS app will use to generate an image. This endpoint accepts several parameters:
- The main prompt (like “An astronaut riding a horse on the moon”).
- The negative prompt (words or phrases you want the AI to avoid, such as “unrealistic, ugly, misfigured”).
- The seed (used to regenerate a consistent image and tweak it with other parameters).
- The number of steps (indicating how intensively the model should work on the image – more steps might take longer but can produce better results).
- And the scale (a higher value means the AI has more liberty in interpreting the prompts).
We also have some backup measures in place in case there’s a hiccup with our iOS app’s implementation. Ultimately, the code sends a request to replicate.com, specifying a model version and passing along the input data. If everything goes smoothly, you’ll get a download URL in return. This URL is later on passed to the frontend app, allowing the user to fetch and view the generated image.
Stay with me for Part 2, where we’ll delve into the iOS frontend, making our textual prompts materialize as vivid images! 😎🔥

Leave a Reply